Multi-Point Auto Clicker: Click Multiple Locations
Click several locations in order on Windows 11/10. Capture each point, set its delay and repeat count, then test one full sequence. The steps and screenshots below use Free Auto Clicker 8.1.0.
Download for WindowsWindows 10/11 · x64 · Free · v8.1.0
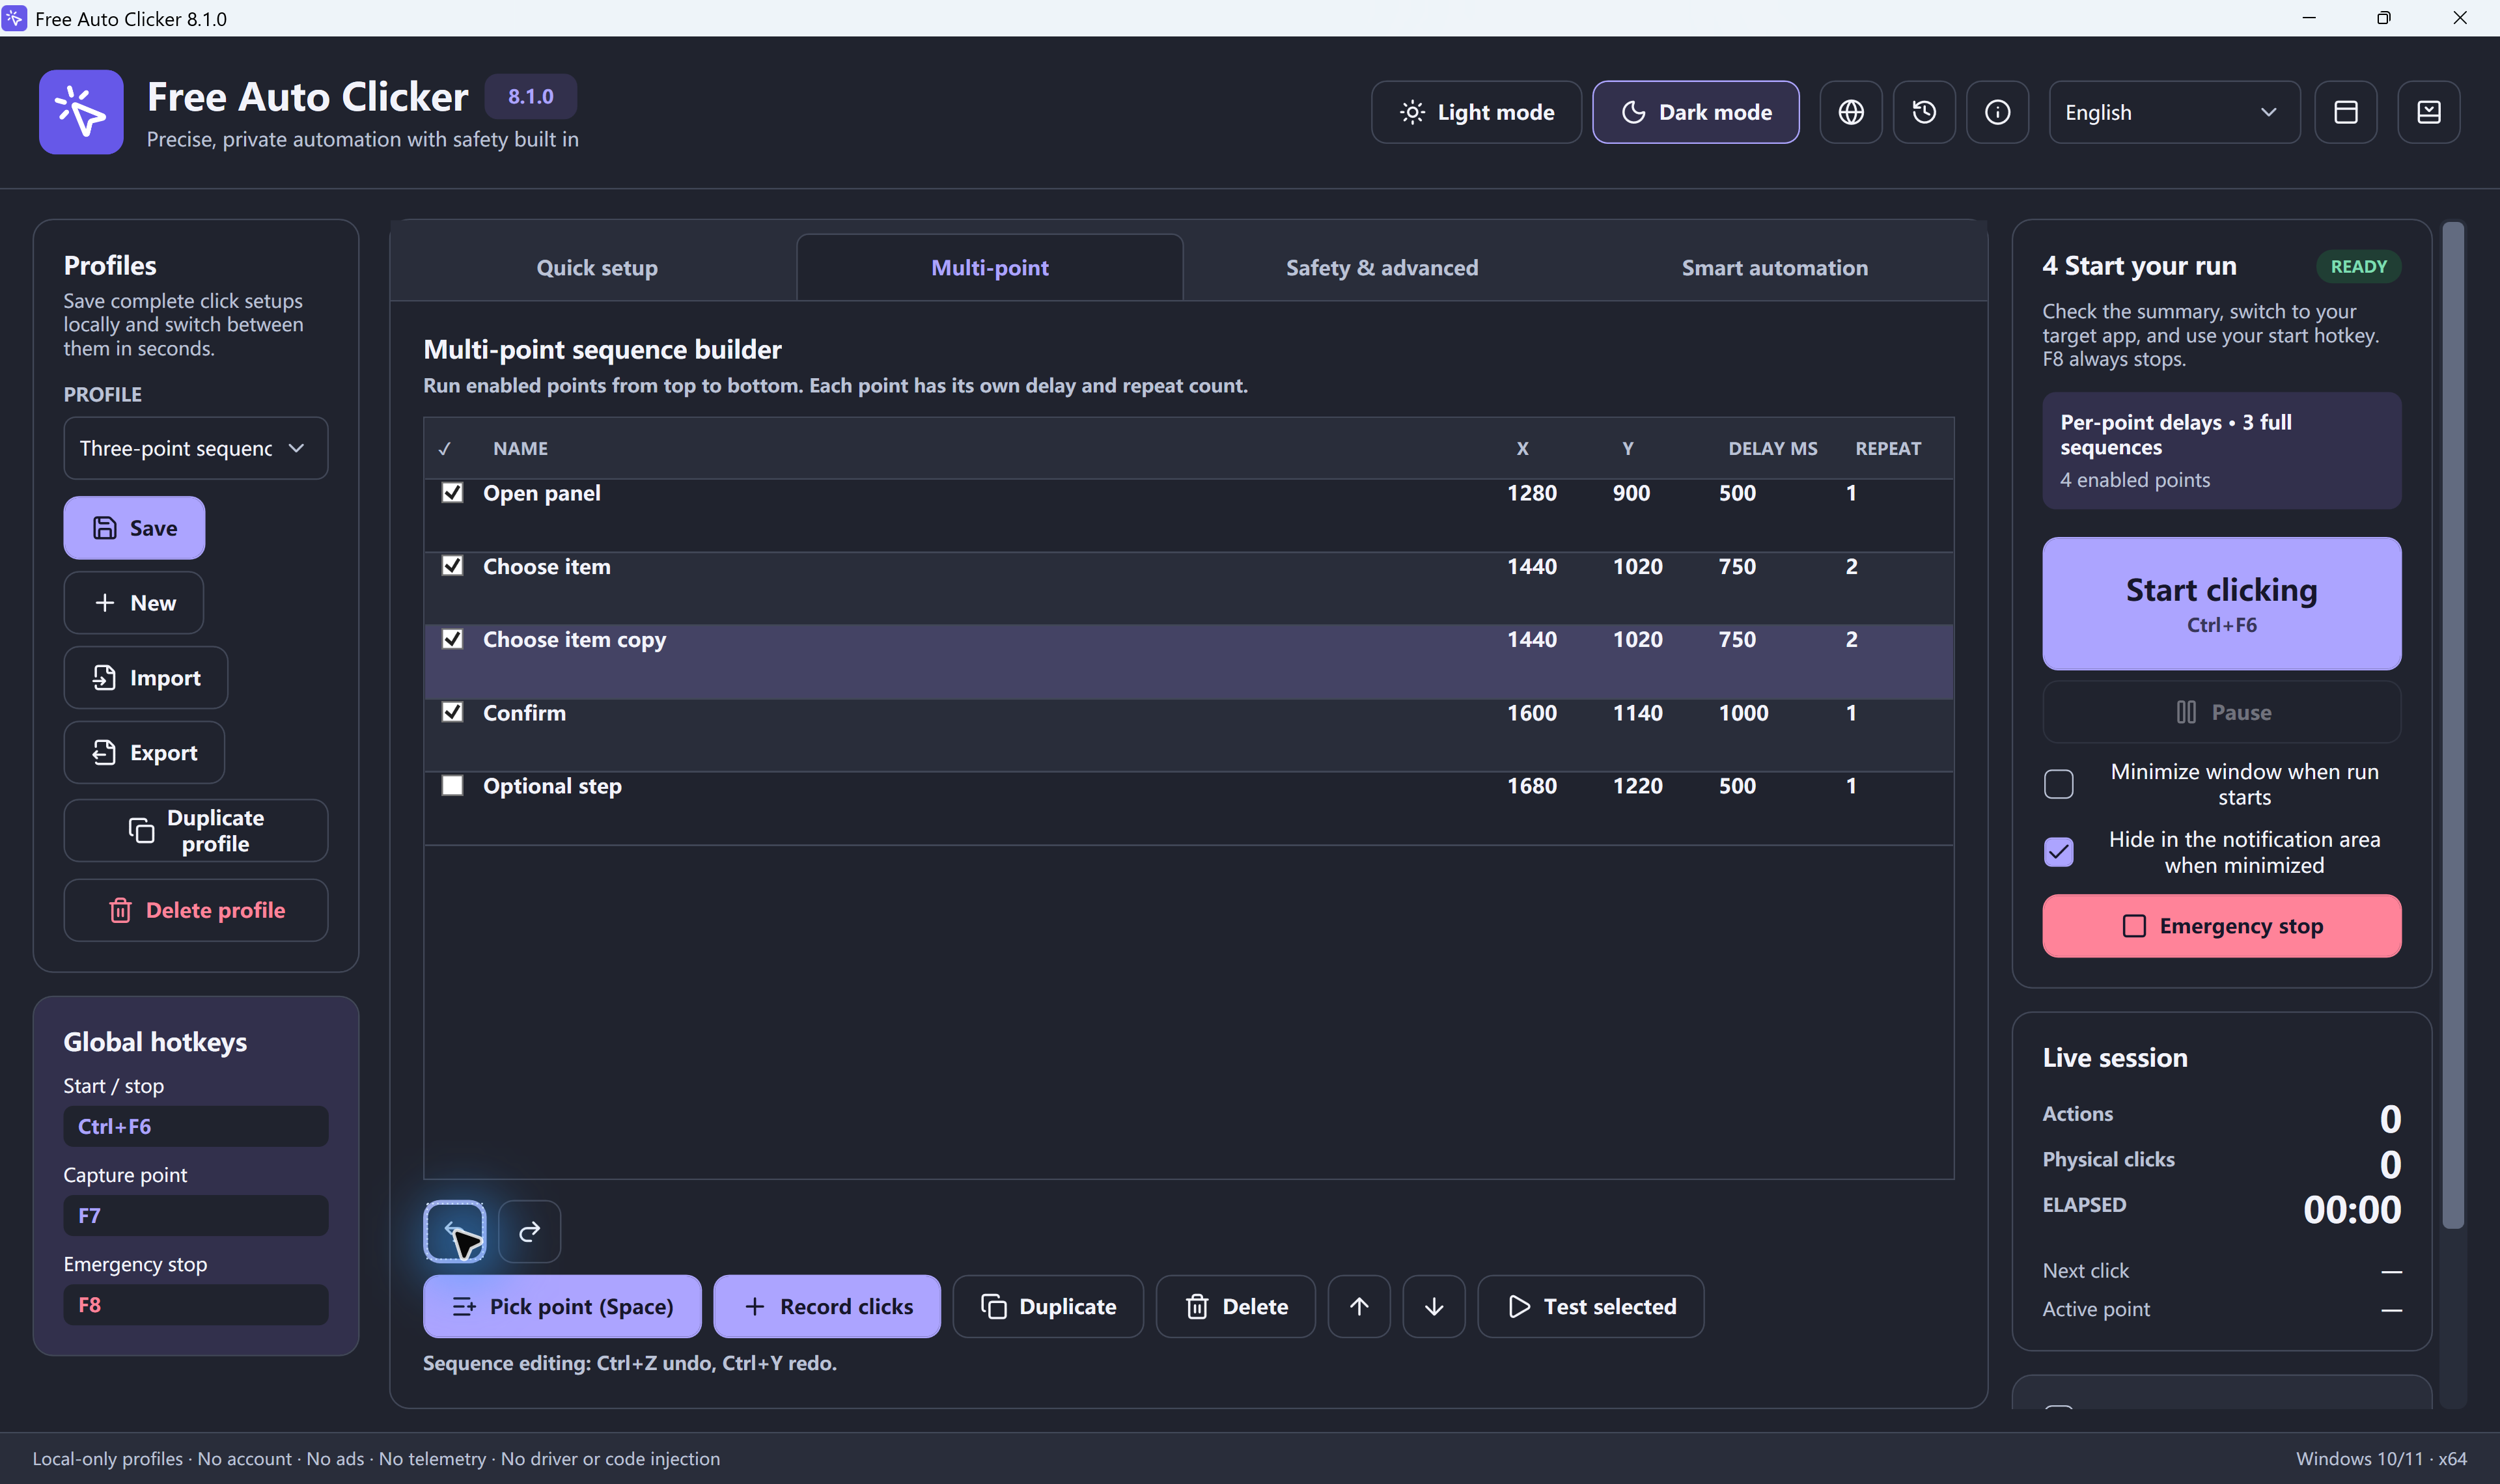
To auto click multiple locations: select Point sequence in Quick setup, capture the targets in Multi-point, then review each row's Delay ms, Repeat and enabled checkbox. Set a small full-sequence limit, switch to the visible target window and use the current Start/stop key. F8 is the emergency stop.
New to sequences? Follow the three-point practice task before adding more targets. Up to 10,000 points are supported.
Table of Contents
Single-point versus multi-point clicking
| Mode | How it works | Typical use |
|---|---|---|
| Single point | Repeats clicks at one recorded coordinate | A control that stays in one fixed position |
| Multiple points | Moves through an ordered X-Y List | A desktop workflow with several fixed controls |
How to record multiple click points
- Open Quick setup, select Point sequence under Choose where to click, then open Multi-point.
- Keep the target window visible in its intended position. Select Pick point (Space), move to the target, then press Space to capture it. Esc cancels picking. The default Capture point hotkey is F7.
- Repeat for the other locations, or use Record clicks to build the list from your own clicks. Review the recorded positions before playback.
- Check each row’s X/Y coordinates, Delay ms, Repeat and enabled checkbox. Use the up/down buttons to arrange the order; turn off rows you do not want to run.
- Choose a short repeat limit, review the summary, switch to the target window and use your current Start/stop hotkey. The default is F6; F8 is the emergency stop.
Enabled points run from top to bottom. Each point has its own delay and repeat count; the run summary shows how many full sequences are configured. You can reorder or edit a row without deleting and recording the whole list again.
Try one three-point sequence
Open a blank spreadsheet and use empty cells A1, B1 and C1 as harmless practice targets. Keep its window visible, in the same position and at the same zoom while you capture and test.
| Order | Target | Delay ms | Repeat |
|---|---|---|---|
| 1 | Cell A1 | 500 | 1 |
| 2 | Cell B1 | 1,000 | 1 |
| 3 | Cell C1 | 500 | 1 |
- Capture the center of each cell with Pick point (Space). Use your own captured X/Y coordinates, not the coordinates in the screenshot. Set each row's Delay ms and Repeat to the table values; disable any other rows.
- In Quick setup, choose Left and Single. With Point sequence selected, choose Repeat this many times = 1. Check that the run summary describes one full sequence.
- Bring the spreadsheet to the foreground and press your current Start/stop hotkey: F6 by default. Watch the target selection move through the three cells. Press F8 immediately if the pointer lands elsewhere.
Expected result: A1 → B1 → C1, one click at each location, then the run ends. Only after this works should you add points or increase full-sequence repeats. A slower application may need longer row delays.
Save and reuse a multi-point sequence
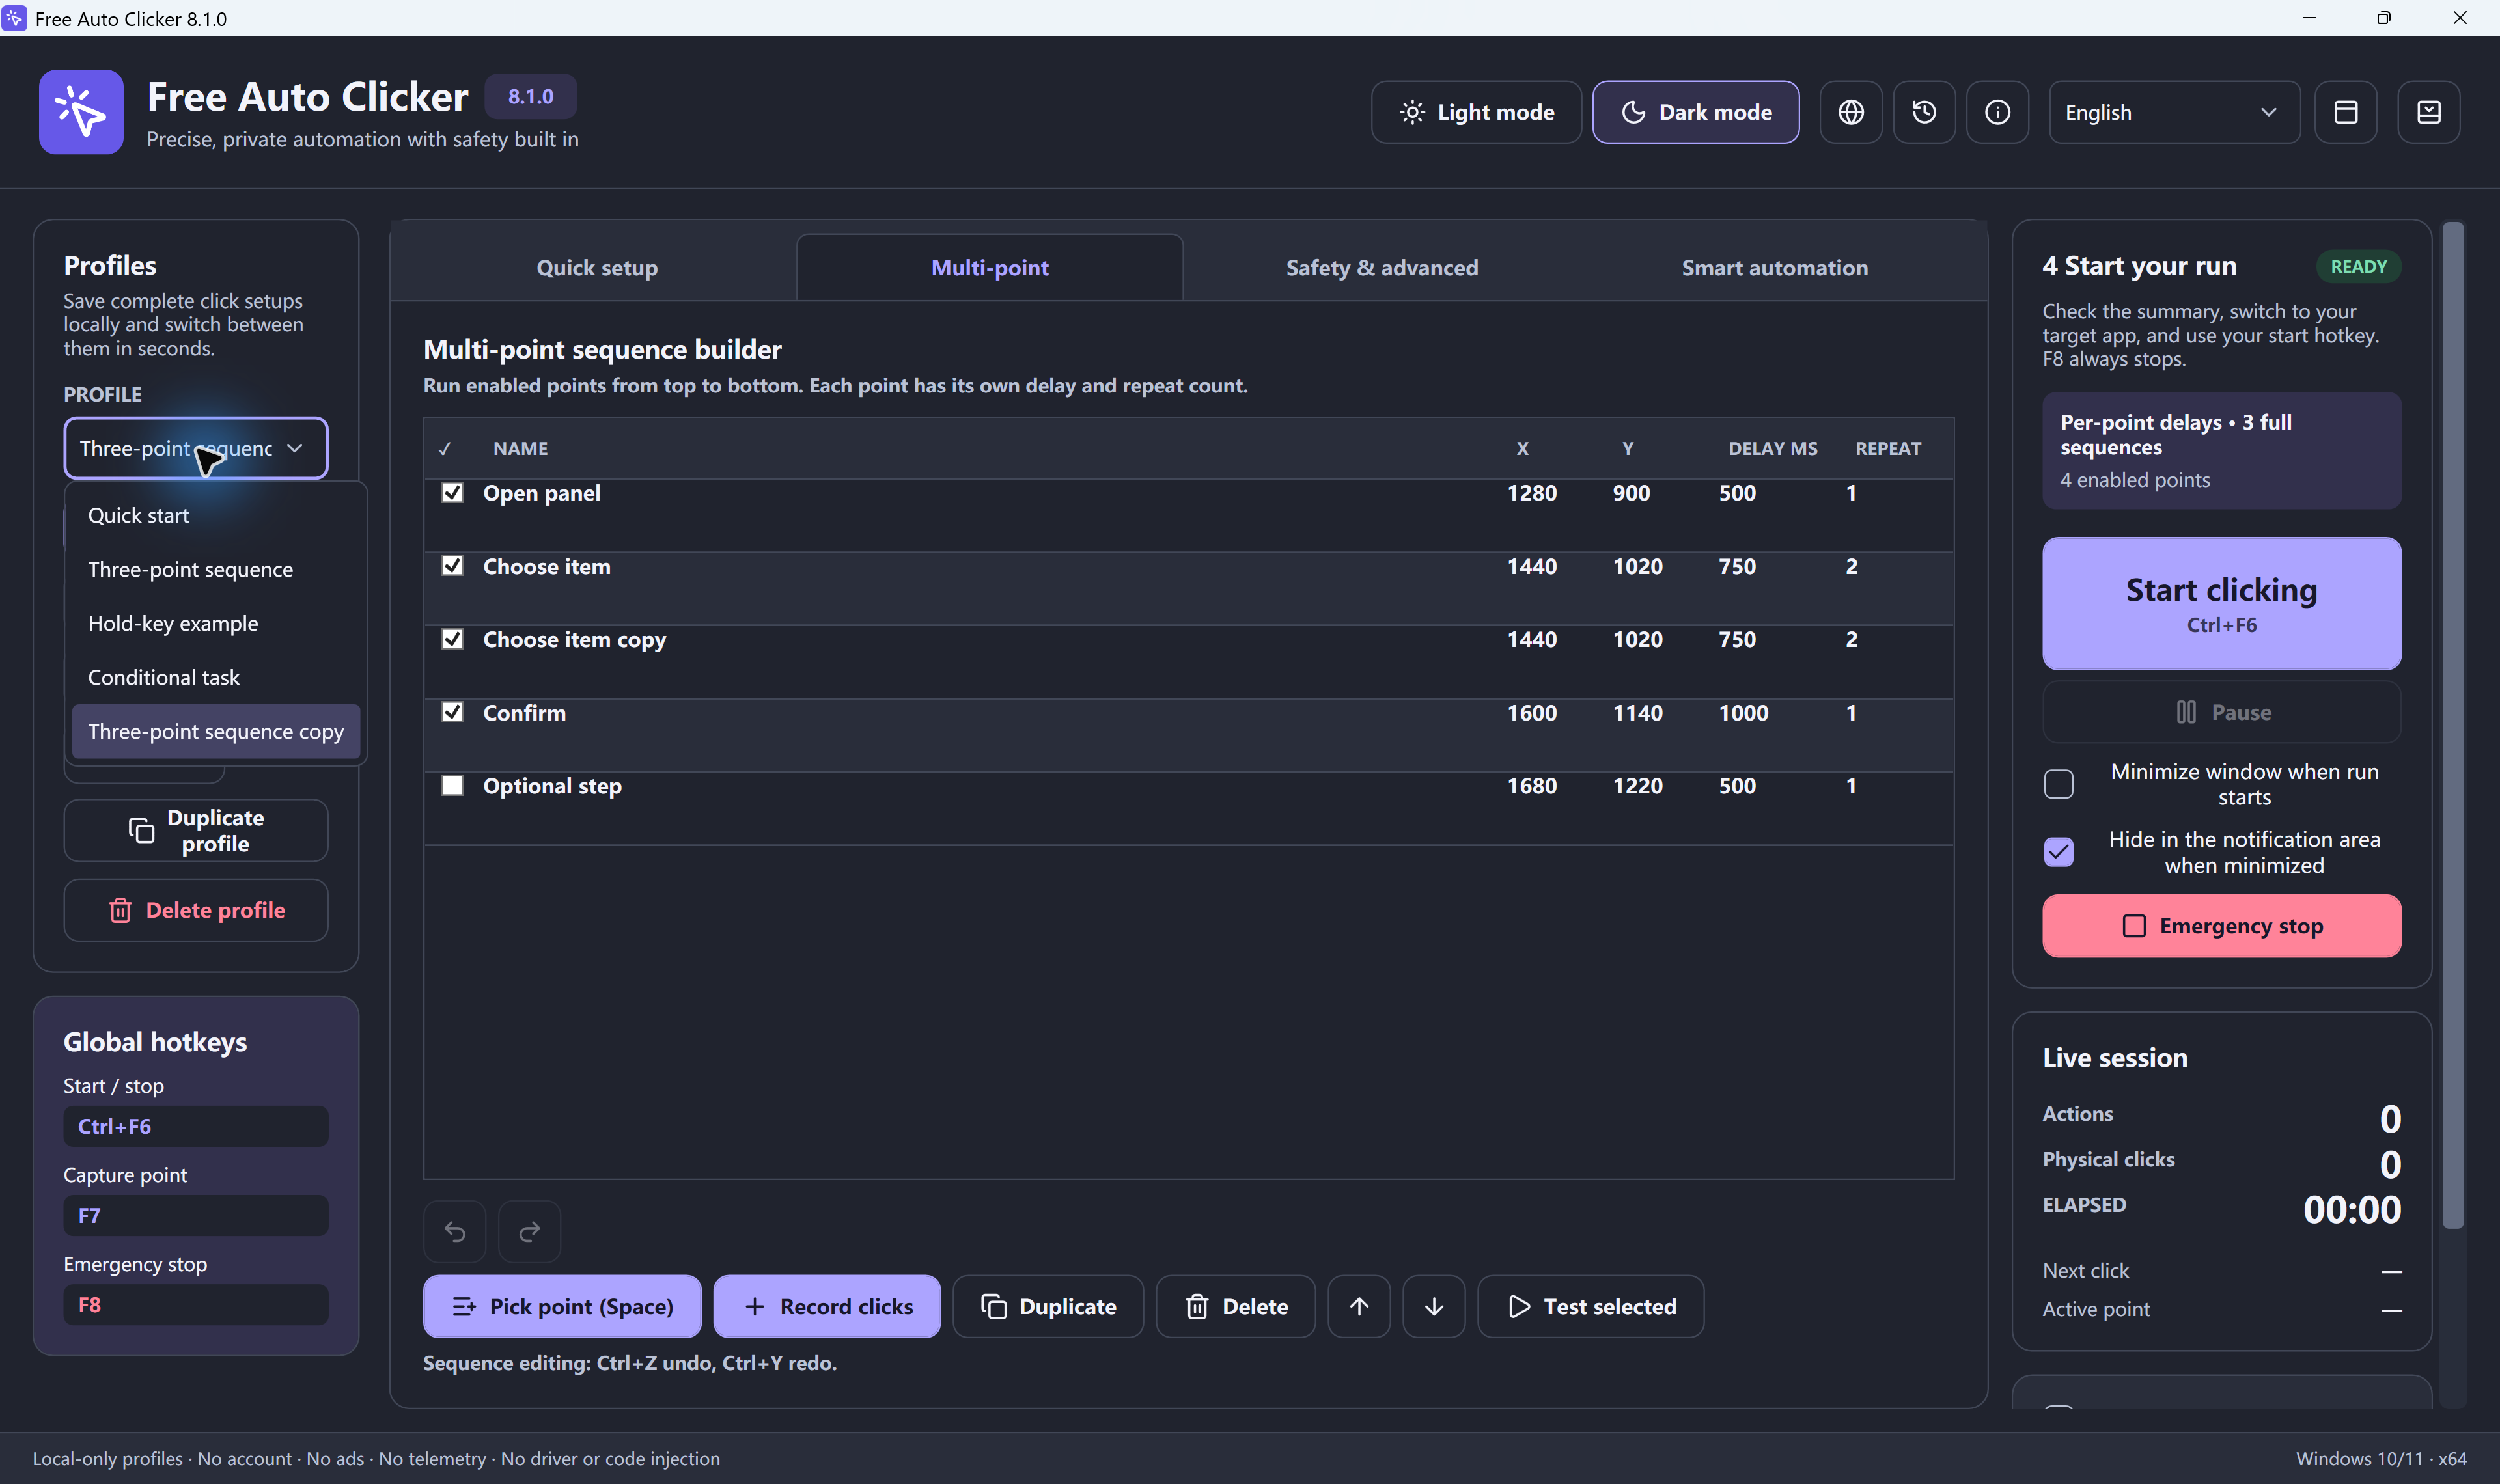
Select Save in the Profiles sidebar to keep the current setup locally. Select a saved profile from the dropdown when you want to use it again.
Use Export to write a .fac profile file for backup or transfer, and Import to bring that file into the app. Saving a local profile and exporting a file are separate actions; there is no separate Load button in this interface.
After importing or switching profiles, check the hotkey, coordinates, enabled rows and run limits. A profile cannot tell whether a button has moved in the target application.
Set the interval and stop condition
In Point sequence mode, read the Delay ms and Repeat on every enabled row. A row repeat controls that location; the Quick setup repeat limit controls full sequences. Review both before a test.
- Start with one full sequence and Repeat = 1 on each row.
- Give screens and dialogs time to respond. If a point misses because the target is not ready, increase that row's delay.
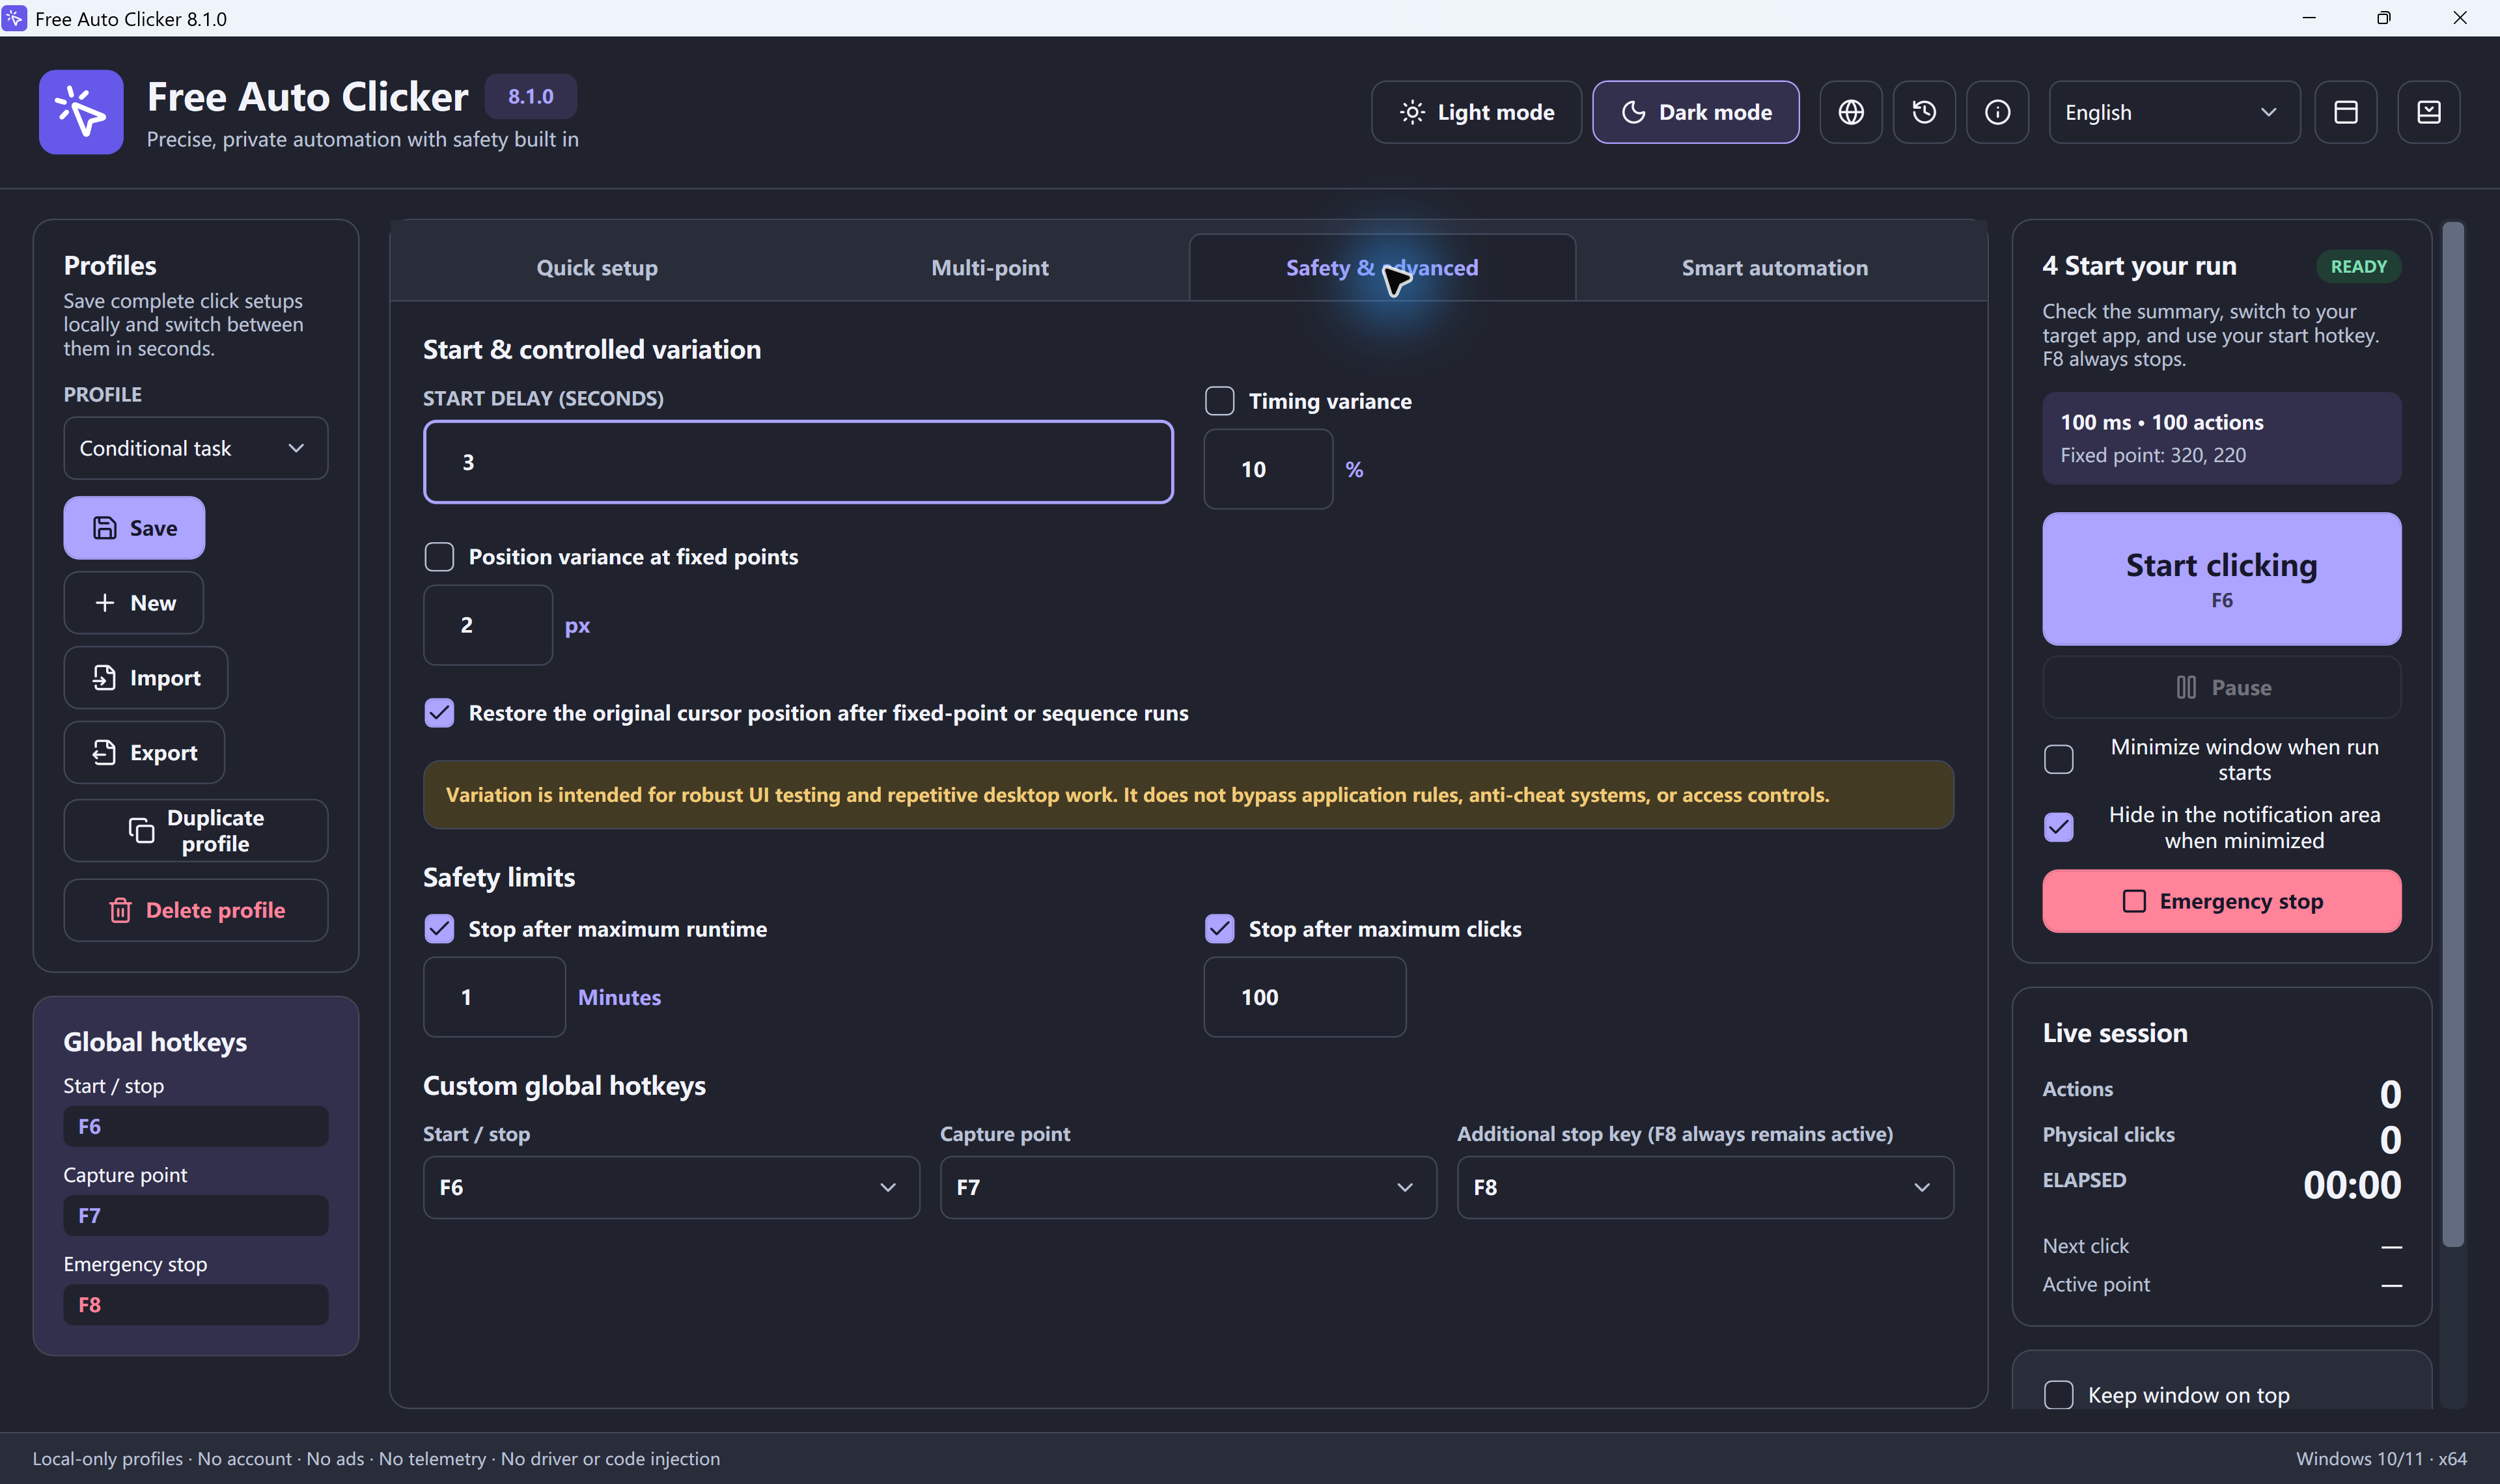
- In Safety & advanced, set a maximum runtime or maximum-click ceiling. A safety ceiling can end a run before the full sequence completes.
For the fields and timing calculation, see the interval and stop-condition guide. The ms-to-CPS calculator estimates configured timing; the target application may accept clicks more slowly.
Important limitation of fixed coordinates
Ordinary X-Y points are fixed screen positions, not named buttons. Keep the window layout stable and check the coordinates after scrolling or resizing. Optional window-relative targeting can follow a selected window’s position, but cannot identify a control after its internal layout changes. Input still goes to a visible foreground window; minimized or hidden targets are not supported.
Troubleshooting multiple click locations
The clicks run in the wrong order
Press F8 to stop. In Multi-point, select a row and use the up/down buttons to change its position. Use Delete only for a point you no longer need; undo or redo sequence edits with Ctrl+Z or Ctrl+Y.
A point misses its target
Press F8 first. Bring the intended target window to the foreground and restore the position, size, zoom or scroll state used while capturing. Check the selected row's X/Y and correct or capture the point again if the layout changed. If the coordinates are right but the next control appears late, increase that row's Delay ms. Retest one sequence with a small limit.
Use the coordinate guide for capturing a point or the Windows troubleshooting guide when software clicks are not accepted.
The sequence needs a right click
Choose the right mouse button before starting. Read the right-click auto clicker guide for details.
Multi-point auto clicker questions
How do I click each location only once?
Enable only the points you need and set every row's Repeat to 1. In Quick setup, choose Repeat this many times and enter 1. Review the summary for one full sequence before starting; a per-row repeat and a full-sequence repeat are different settings.
Does the basic interval replace every point's delay?
No. A point sequence uses the Delay ms value on each enabled row. Review those values in Multi-point instead of assuming that changing the basic Quick setup interval updates the whole list.
Can the sequence click a minimized or hidden window?
No. Free Auto Clicker sends normal input to a visible foreground window. Window-relative coordinates can follow a selected window's position, but they do not make hidden controls clickable or identify a button after its layout changes.
Use multi-point automation responsibly
Use automation only for tasks where you have permission. Do not use it to bypass security controls, online voting rules, financial confirmation steps, or third-party policies. For the full installation and setup workflow, read how to use Free Auto Clicker.
Ready to automate the clicks on your PC?
Free Auto Clicker repeats clicks at your chosen interval in a permitted, visible foreground Windows app.
Download for WindowsWindows 10/11 · x64 · Free · v8.1.0