
A mouse click recorder and an auto clicker both repeat input, but they start from opposite directions. A recorder watches a demonstration and turns captured clicks into a sequence. A traditional auto clicker starts with rules: where to click, which button to use, how long to wait, and how often to repeat.
The better choice depends on the job. Recording is fast for discovering a multi-step path. Manual configuration is clearer when precision, safety, or long-term reuse matters. In many cases, the most reliable workflow is hybrid: record a short sequence, then edit every point before running it.
Table of Contents
At-a-glance comparison
| Question | Click recorder | Configured auto clicker |
|---|---|---|
| Fastest way to capture several points? | Usually yes | Slower if every point is added manually |
| Easiest to audit before running? | Requires cleanup | Usually clearer |
| Best for one fixed repeated point? | More than needed | Yes |
| Best for a visible multi-step path? | Good starting point | Good after points are defined |
| Easy to add per-step delays and repeats? | After editing | Yes |
| Resilient when a window moves? | Only with window-relative cleanup | Yes, when configured relative to the target |
What a click recorder captures
A recorder can turn each click into an ordered point containing coordinates and timing. That removes the need to copy X and Y values one at a time. It is especially useful for a short path such as opening a menu, choosing an item, and confirming a result in a test application.
But raw recordings are rarely production-ready. Human pauses may be unnecessarily long or too short. Accidental clicks may be included. Screen coordinates can become invalid if the window moves. A recorded sequence should therefore be treated as a draft, not as proof that the automation is safe.
What a configured auto clicker does best
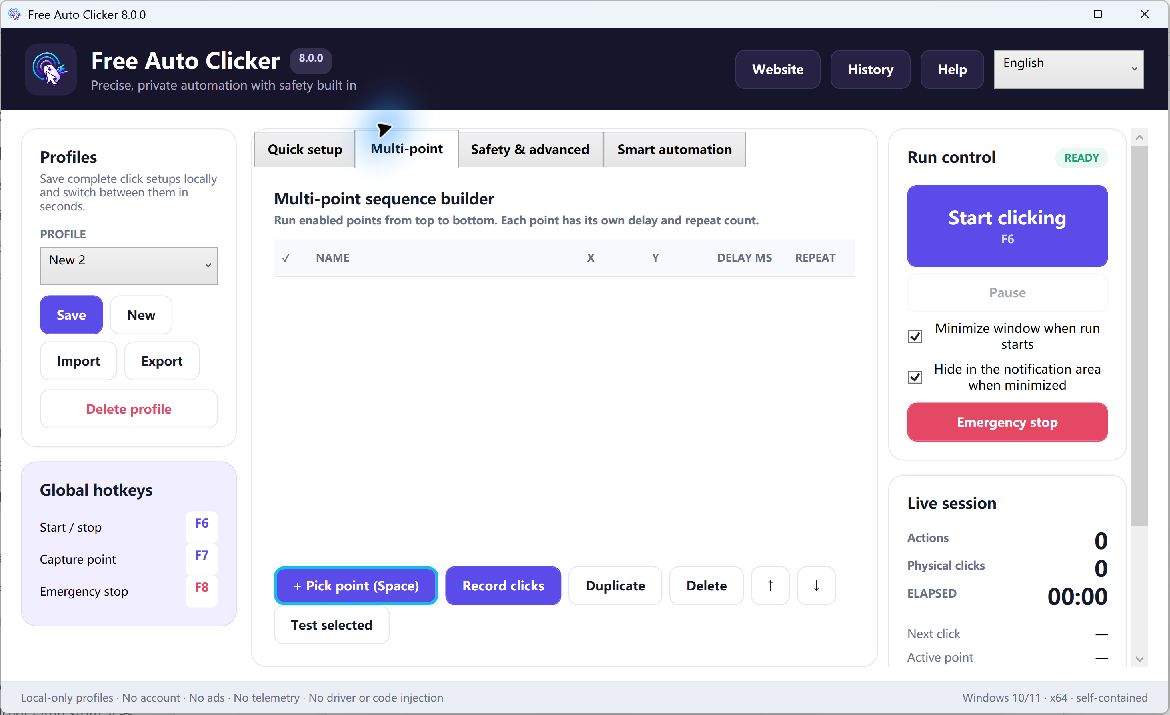
A configured sequence is explicit. Each point can have a name, X/Y position, delay, repeat count, enabled state, mouse button, and action. Points can be reordered, duplicated, deleted, or tested individually. This takes longer to build, but it is easier to explain and review.
For a single fixed button, recording is unnecessary. Capture the target coordinate, choose the interval and repeat rule, set a limit, and run a short test. For several buttons, use the ordered multi-point mode and give every point a meaningful name such as “Open menu,” “Choose test item,” and “Close dialog.”
When to record
- The workflow has several visible click points.
- You can demonstrate the correct path in a safe test environment.
- The first goal is to discover order and approximate timing.
- You intend to inspect and edit the captured points afterward.
When to configure points manually
- The task repeats one point or a very short sequence.
- Exact delays, repeat counts, or mouse actions matter.
- The workflow will be saved and reused by someone else.
- A target-window check or pixel condition must guard the action.
- The consequences of a wrong click are significant.
A reliable hybrid workflow
- Prepare a harmless test state. Do not record around real payment, delete, send, or account controls.
- Start click recording. Demonstrate one short path at normal speed.
- Stop and inspect the point list. Remove mistakes and duplicate events.
- Name every point by purpose. Names reveal ordering errors faster than raw coordinate pairs.
- Replace fragile timing. Set deliberate per-point delays; use a pixel-color condition if a visible state is more reliable than a fixed wait.
- Bind to the target window. Convert suitable points to window-relative positions.
- Disable uncertain points. Test selected points individually before running the complete sequence.
- Add limits. Set a finite repeat count, maximum runtime, or maximum click count.
- Run once under supervision. Keep F8 ready as the emergency stop.
- Save a named profile. Include the app, purpose, and date in the profile name.
Example: a three-step test path
Suppose you need to test a settings dialog repeatedly:
- Open the Settings tab.
- Toggle a harmless test option.
- Close the dialog without saving.
Recording finds the three approximate points quickly. Cleanup then makes the sequence repeatable: rename the points, change each to a window-relative coordinate, add a short delay after the tab opens, and wait for a known pixel color before toggling the option. Limit the complete run to three cycles.
What a mouse click recorder does not understand
A recorder sees input, not intent. It does not know whether a button is safe, whether the application is ready, whether a dialog changed, or whether a service permits automation. Those decisions remain with the person building the workflow.
Before replaying a recording
- Remove accidental and redundant clicks.
- Check every coordinate after screen or window changes.
- Replace fragile delays with visible-state checks when possible.
- Test selected points before the full path.
- Avoid credentials, purchases, submissions, and irreversible actions.
Frequently asked questions
Is a click recorder the same as a macro recorder?
Not always. A click recorder may capture only mouse actions, while a macro recorder can include keyboard input, application commands, or more complex logic. Check the exact feature set instead of relying on the label.
Can I edit a recorded click sequence?
In Free Auto Clicker, recorded points can be reviewed in the multi-point list, where you can change names, coordinates, delays, repeats, order, and enabled state.
Should I preserve the original recorded delays?
Only if they have a clear purpose. Human demonstration timing is incidental. Replace it with delays or visual conditions that match the target application.
What if the target window moves?
Use target-window binding and window-relative coordinates. Absolute screen coordinates remain tied to the desktop.
See the step-by-step guide to recording multiple mouse clicks and learn how window-relative points work.