
An auto clicker for software testing is useful when you need to repeat a small visible path through a Windows interface and observe the result. It can help with smoke testing, endurance checks on a harmless control, hit-area checks, and reproducing a short sequence.
It is not a replacement for unit tests, integration tests, accessibility automation, or a supported UI-testing framework. An auto clicker sees coordinates and visible conditions; it does not understand the application’s internal state. Use it for the narrow cases where physical desktop interaction is itself part of the test.
Table of Contents
Good and bad testing use cases
| Good fit | Use another tool |
|---|---|
| Repeat a short visible smoke-test path | Validate database or API correctness |
| Exercise a large harmless button repeatedly | Automate a minimized or headless application |
| Check behavior across a small click area | Locate controls by accessible name and role |
| Wait for a simple visible color state | Assert complex application state |
| Reproduce a timing-sensitive UI issue | Run unattended destructive workflows |
Design the test before recording clicks
Write down four items first:
- Starting state: the exact window, screen, and test data visible before the first click.
- Action path: the smallest sequence needed to exercise the behavior.
- Expected observation: the visible status, color, dialog, or counter that indicates success.
- Stop condition: a repeat count, click count, runtime, or visible failure that ends the run.
If you cannot describe the expected observation, repeating the clicks will create activity without producing a meaningful test result.
Build a repeatable Windows UI test
Step 1: isolate a safe environment
Use a staging build, demo account, sample document, or disposable data. Do not begin with a live production screen. Disable notifications that could steal focus, and close unrelated applications near the target coordinates.
Step 2: bind the intended window
Select the target process and expected title. Exact matching is valuable when the sequence must never continue after focus changes. If the application title contains a changing filename, document and test the chosen rule rather than weakening it casually.
Step 3: choose window-relative coordinates
Capture click points relative to the target window so moving the window does not invalidate every screen coordinate. This does not protect against an internal layout redesign, so retest after application updates.
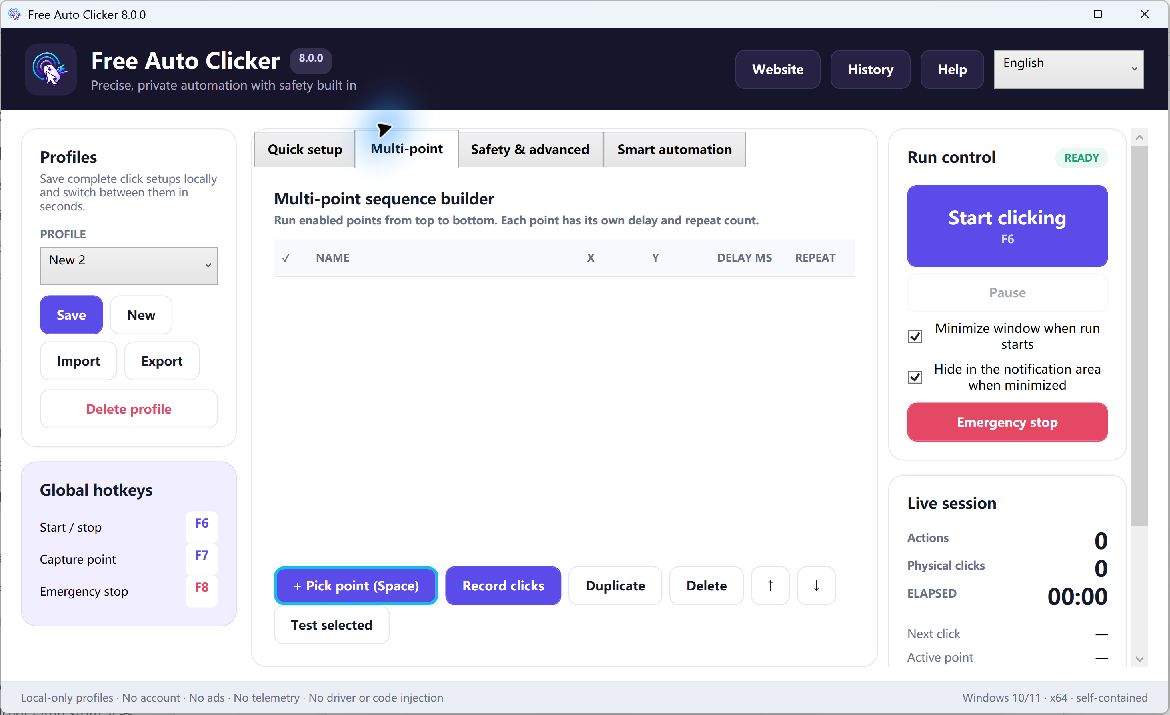
Step 4: create the shortest multi-point path
Record or add only the necessary actions. Give each point a purpose-based name, then set its delay, repeat count, and enabled state. Test selected points individually before running the full order.
Step 5: wait for state, not just time
When a visible indicator reliably changes color, use a pixel-color condition with a sensible tolerance and timeout. A condition can reduce false clicks caused by slow or variable load times. Keep the sampled area stable and avoid anti-aliased text pixels that change with rendering.
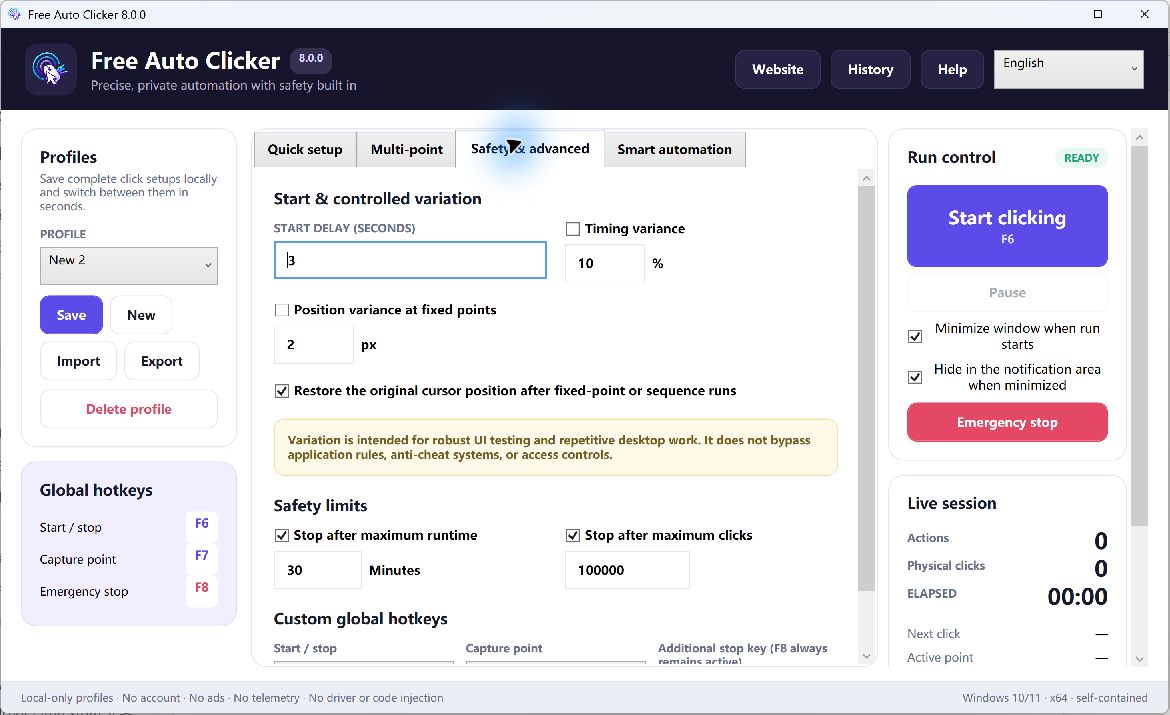
Step 6: add hard limits
Use at least one automatic boundary: finite repeat count, maximum runtime, or maximum click count. For a new sequence, use more than one. Confirm that F8 stops the run before increasing the duration.
Step 7: save the test profile
Name the profile with the target app, scenario, environment, and revision. Export a .fac copy with a short README containing the starting state, expected result, display scaling, target app version, and last-tested date.
Worked example: three-cycle settings smoke test
Goal: verify that a settings dialog can open, switch to a tab, and close cleanly three times in a demo build.
- Start from the demo app’s main screen with no unsaved data.
- Bind to the demo app process and title.
- Add a window-relative point named “Open settings.”
- Add a point named “Open appearance tab” after the dialog becomes visible.
- Add a point named “Cancel dialog” so no settings are saved.
- Wait for a stable dialog color before clicking the tab.
- Repeat the three-point sequence three times.
- Set a maximum runtime of one minute and keep F8 ready.
Observe whether the dialog opens in the expected state, whether controls remain responsive, and whether memory or visual artifacts accumulate. Record those observations separately; click automation alone does not create a test report.
Making the test reproducible
- Record Windows version, target app version, language, resolution, and scaling.
- Use stable test data and a defined starting screen.
- Save the exact profile revision used for the run.
- Change one timing or variance setting at a time.
- Capture the expected and actual result outside the clicker.
- Retest every point after an application UI update.
When to graduate to a UI test framework
Move to a supported automation framework when you need unattended execution, control discovery by name or role, assertions, screenshots on failure, logs, CI integration, cross-machine reliability, or access to application state. Microsoft UI Automation, application-specific test APIs, and established testing frameworks are better suited to those requirements.
A coordinate-based auto clicker should remain a transparent, supervised tool for small tests—not the hidden foundation of a critical release pipeline.
QA safety checklist
- The environment and data are disposable or reversible.
- The target window and starting state are documented.
- Every point was tested individually.
- The run has finite repeat, click, or time limits.
- The expected result is observable and recorded.
- The workflow contains no purchase, send, approval, or destructive action.
Frequently asked questions
Can an auto clicker replace automated UI testing?
No. It can repeat visible mouse actions, but it lacks the control discovery, assertions, reporting, and CI integration expected from a full test framework.
How do I test an interface that loads at different speeds?
Prefer a reliable visible-state condition with a timeout. If you must use timing, choose a safe lower bound and test the slow case.
Why use window-relative coordinates?
They keep a point aligned when the target window moves. They do not protect against internal layout changes, scaling differences, or a redesigned UI.
Can I run the test unattended?
Coordinate-based desktop automation is safest when supervised. For unattended or release-critical testing, use a supported UI automation framework with assertions and failure reporting.
Learn how to record a multi-point sequence, wait for a pixel color, and configure safety limits.